
Introduction
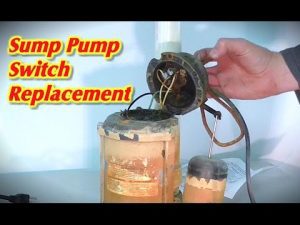
The sump pump is a very efficient mechanical device with a fair bit of technology as well. It has several crucial components where the float switch is considered as the most important of all. A lot of things need to be considered regarding the quality, efficiency and ease of use of the float switch. If it is a manual one, then the location of the float switch must be ideal to access it with ease at the time of the need. The automatic float switches are the ideal ones as they are automatically activated at the time of need. It detects the inflow of the water in the crawlspace and the float switch responds in accordance to the needs of pumping out the water.
However, there could be many issues related to the sump pump float switch where it might malfunction or couldn’t work as per your expectation and needs of the job. If this is the situation, then the switch should be replaced with a new one. It is a simple Do It Yourself project, which you can do without any external help required. This guide will also tell you as how could you replace the float switch of your sump pump.
Replacing the sump pump float switch
A sump pump float switch needs to be replaced if it is not performing the job of the simple On/Off process. It might get damaged due to pebbles and debris in your sump pump pit or it may also be due to poor maintenance of the equipment. The following are the things required for accomplishing this task:
- The replacement switch
- Glue
- Zip ties
- Screw driver
- Silicone Sealant
- Concrete Sealant
The major steps required for replacing the switch
The following is a list of the major steps which you need to perform for replacing the float switch of your sump pump equipment:
- Preparing the equipment for the replacement–The sump pump is prepared for the float switch replacement by draining out all the water which could be present in the sump pump basin. Once all the water has drained out, then you must disconnect the sump pump from the power source in order to remove the switch safely.
- Removing the switch – If you are unable to locate the float switch, then the location can be determined easily by reading the product user manual. Once the location is determined, then just removes the malfunctioning float switch from the unit. This will make things ready for exposing the housing of the float switch.
- Opening the float switch – The screwdriver should be used then for unscrewing all the connection of the float switch. The access to the float switch housing would expose the electrical switch inside it. Remove and replace the switch using the waterproof glue. Let it dry completely before you re-assemble the switch and also then replacing that into the pump.
- Test after replacing – The switch should be inserted back into the pump. Test the switch if it is performing according to the requirement and expectations or not. If not, then you should be checking it thoroughly to sort out the issue quickly.
It’s a minor task, still needs to get fixed accurately and quickly. People mostly prefer to work this out on their own. But, it should also be considered as an important and crucial task. Because any fault while fixing the switch may affect the performance and overall working of you sump pump and may lead to bigger issue and hazards top the sump pump itself.


